Term 4 Week 4- 'Haunted House' Halloween Art
First step, we need to design/draw our haunted houses. Look at pictures of haunted houses for inspiration- we need big windows, banisters, a pointy roof etc.
Next, we need to add a moon. We need to colour the moon and the lights in the windows in yellow oil pastel. Then we need to colour the house and the hill it is perched on in black oil pastel. If you have added a spooky tree, that needs to be coloured black also.
Finally we need to paint with water colours- either choose warm colours (red & orange) or cool colours (purple & blue). These colours need to be mixed in the background.

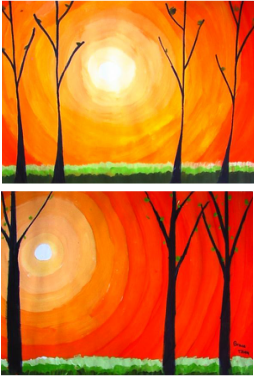
Term 4 Week 3- Sunset Landscape
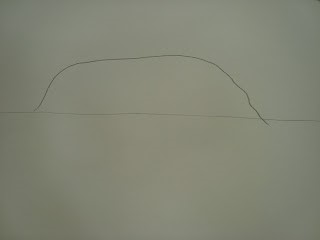
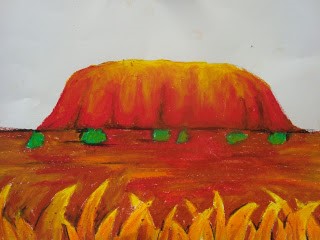
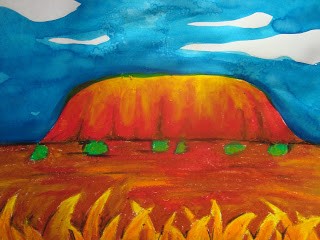
Term 4 Week 1- Uluru Landscape
Our artwork this week ties in with our Geography unit from last term, as well as looking at the wilderness in our class novel. Use the link to the following website to draw our Uluru landscape.
http://www.onceuponanartroom.com/search/label/Australia
http://www.onceuponanartroom.com/search/label/Australia
|

|
|
|
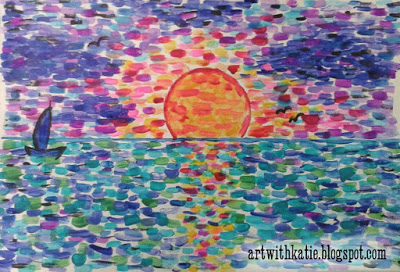
Term 3 Week 10: Landscape- Watercolour Sunset
Students draw a horizon line using a ruler. Then add the sun. Watch the teacher demonstration on using the 'dab' style of water colours on our page. Remember to try and hide our pencil lines with these colours! We are trying to create a layered effect with our paints, so make sure you mix the colours on the page.
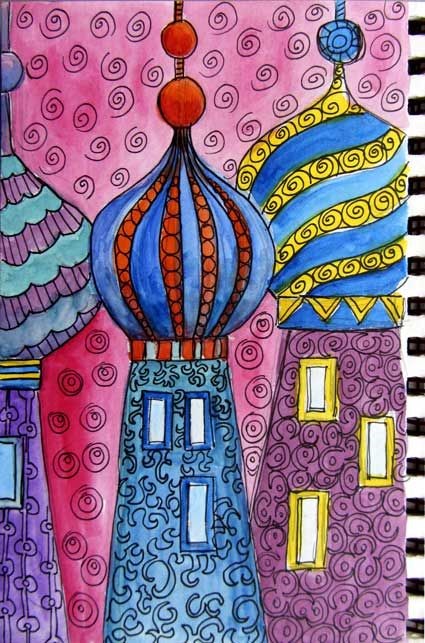
Term 3 Week 8-9- City scapes: Russian Skyline
Introduction
Body
Conclusion
- Display images of a Russian buildings
- Discuss shape, pattern and line
Body
- Children draw a skyline using Russian style buildings
- Children colour buildings and skyline using oil pastels and water colours
- Once dry children add details with black felt tip pen
Conclusion
- Display completed art work
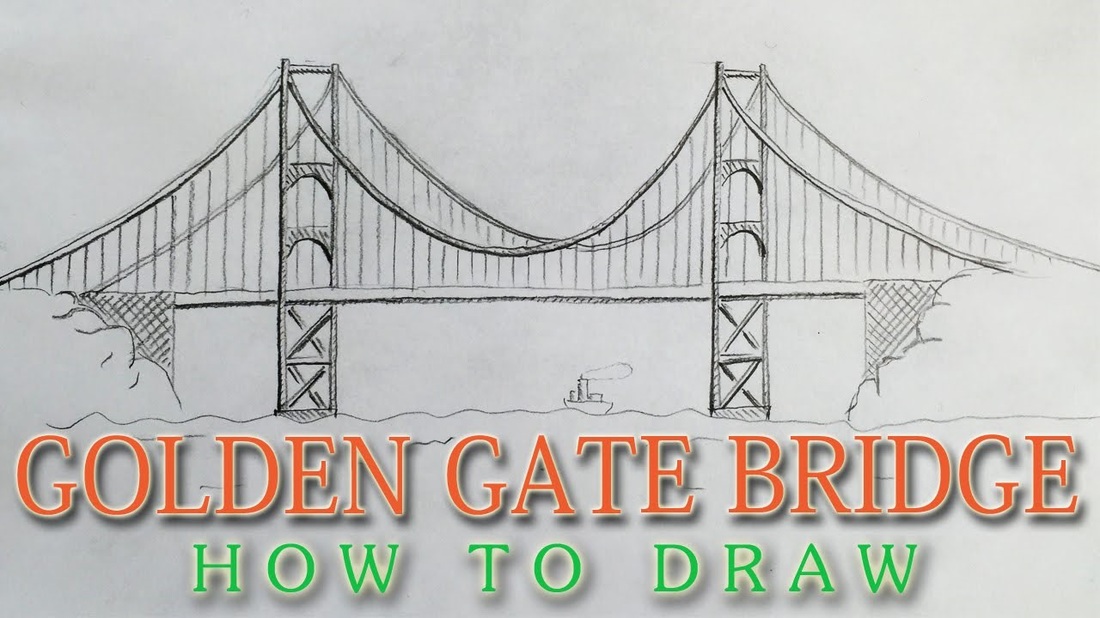
Term 3 Week 7- Golden Gate Bridge
This week we are looking at drawing a city structure. We are going to follow the instructions from the following YouTube video to draw the Golden Gate Bridge in San Francisco. We will be looking at sketching and shading techniques with our lead pencils.
https://www.youtube.com/watch?v=xAb3kcaQl8o
https://www.youtube.com/watch?v=xAb3kcaQl8o
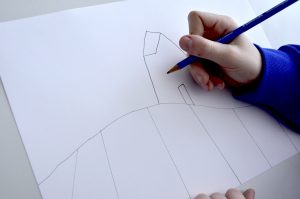
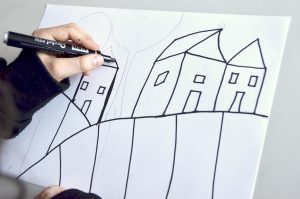
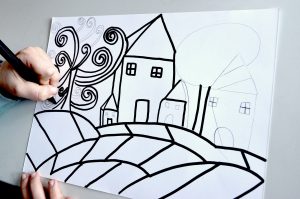
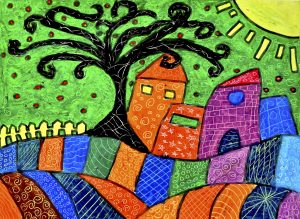
Term 3 Week 5-6 Landscapes with Textures
For our art lesson, we are going to follow the step by step instructions from the following website:
http://arteascuola.com/2016/06/landscapes-with-textures-inspired-by-karla-gerard/
Using these images as inspiration, we are drawing our own abstract towns.
You need to include:
After we have drawn the outline in pencil, we will go over them in permanent marker, before adding 2 layers of bright coloured oil pastels.
http://arteascuola.com/2016/06/landscapes-with-textures-inspired-by-karla-gerard/
Using these images as inspiration, we are drawing our own abstract towns.
You need to include:
- At least 2 tree's
- Some houses/buildings
- Hills or driveways
After we have drawn the outline in pencil, we will go over them in permanent marker, before adding 2 layers of bright coloured oil pastels.
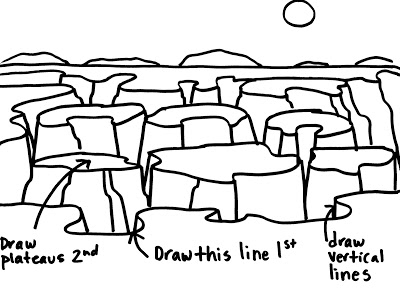
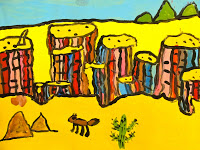
Term 3 Weeks 2-4 Landscapes: The Grand Canyon
Introduction
Show images of the Grand Canyon and discuss colours, features, lines and light
Body
LESSON ONE
LESSON 2
Paint the canyon in stages.
Conclusion
Display pictures on the wall
Show images of the Grand Canyon and discuss colours, features, lines and light
Body
LESSON ONE
- Starting at the bottom of the page, draw a line that will represent the edge of a cliff.
- The line should be about a hands-width from the bottom of the page and should contain curved sections and sections that bend in to one another.
- Draw vertical lines where the lines bend in together. This creates the illusion of depth.
- Next, draw the “pancake” like plateaus. It helps to keep the top part of the pancake relatively flat and then round the bottom. Draw as many “pancakes” as you would like. Add the vertical lines that will turn the “flying pancakes” into plateaus. Encourage lines that bend slightly.
- Draw a straight horizon line near the top of the drawing. Add rock formations, clouds, the sun, etc.
- Once the canyon is drawn, students can now return to the foreground and add cactus, rocks, etc. Because the students are using pencils, they will have a tendency to draw these items small. Strongly encourage bigger items as this will make the painting easier.
- Erase all unwanted pencil lines. A clean, concise drawing makes painting easier. –
- See more at: http://www.deepspacesparkle.com/2010/07/02/grand-canyon-ar-lesson/#sthash.AdwPaGgo.dpuf
LESSON 2
Paint the canyon in stages.
- Chose a color for the foreground and paint this area plus all the plateaus this one color.
- Explain that sticking to one color makes it easier for the eye to pick up the plateaus. This is a great lesson for teaching color consistency for better composition.
- After the plateaus are painted, paint the sky. Bring out all sorts of paints for this (blues, whites, pinks) and let the students mix and play until they got their own personal sky color.
- After the plateaus and sky, it’s time to paint the canyon. This is when the painting starts to look chaotic and messy. Students will fuss, balk and complain that they strongly dislike their painting. Encourage persistence! Suggest limiting the canyon colors to 2 or 3 tones and paint with up and down brush strokes instead of back and forth. This will make a big difference. For the final and most important step, outline all original pencil lines with a small brush dipped in black tempera paint. The lines might be hard to see, so paint where colors meet
Conclusion
Display pictures on the wall
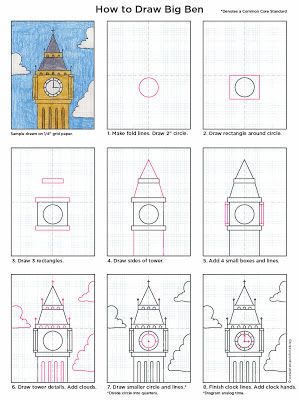
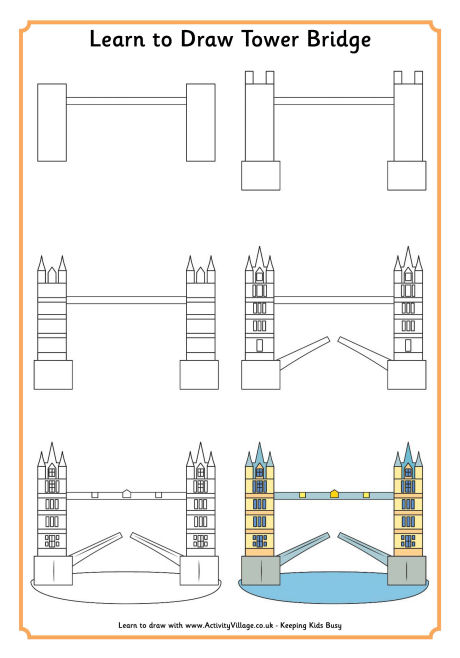
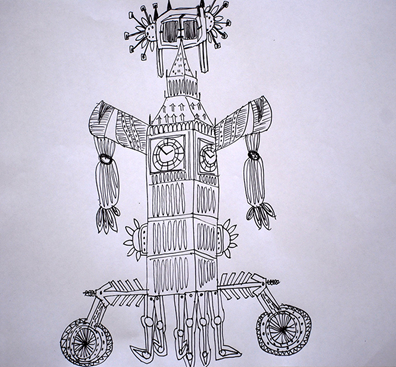
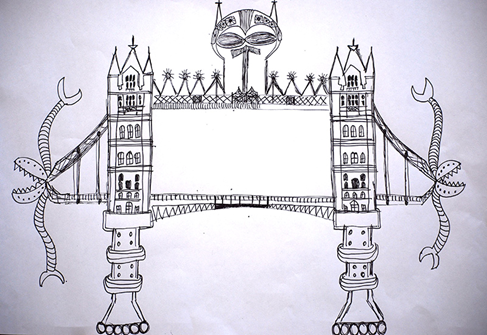
Term 2 Week 9- London Icon Robots
This week for art we are choosing one of two famous London icons (the Big Ben and Tower Bridge) as our novel takes place in London, and are turning them into robots.
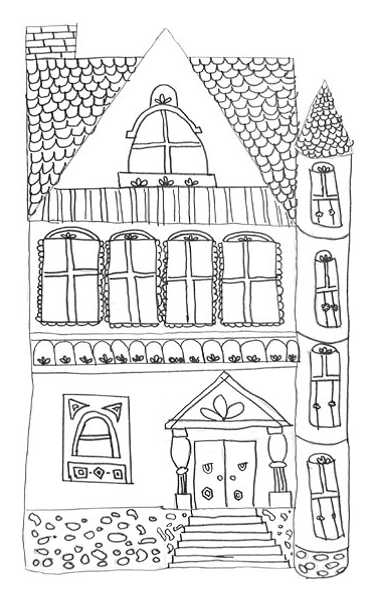
Term 2 Week 4 and 5- Class Novel Art: Victorian House
Students will draw a Victorian style house (like the ones featured in the story) following instructions on the board from the PDF file. Houses will then be outlined, and coloured.
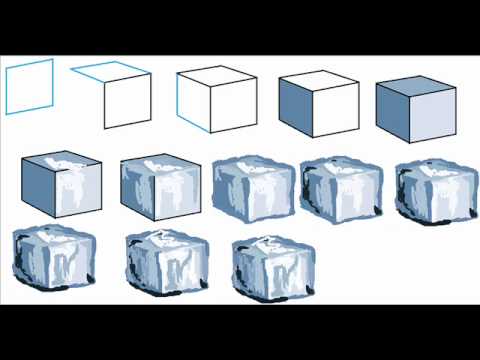
Term 2, Week 2- Melting Ice Cubes
This week for art, we are following some step by step instructions to help us draw a melting ice cube, as part of our Science unit for this term :)
First we will watch the following YouTube video on how to draw a 3D cube:
https://www.youtube.com/watch?v=STAg2ePg8lI
Then we will add the final features by using the following picture for inspiration:
First we will watch the following YouTube video on how to draw a 3D cube:
https://www.youtube.com/watch?v=STAg2ePg8lI
Then we will add the final features by using the following picture for inspiration:
Term 1 Week 6 and 7- First Fleet Artwork
For our art program for the next two weeks, as part of our History unit on Australian Colonies, we are creating an artwork of a ship from the First Fleet.
In week 6, our lesson will focus on the step by step drawing of our ship on our A3 art paper. Below is the video that we will use to guide our drawing. In week 7, we will work on covering our artwork with tea, and then outlining our ships in black marker.
http://artventure.com.au/trynow4.asp
In week 6, our lesson will focus on the step by step drawing of our ship on our A3 art paper. Below is the video that we will use to guide our drawing. In week 7, we will work on covering our artwork with tea, and then outlining our ships in black marker.
http://artventure.com.au/trynow4.asp
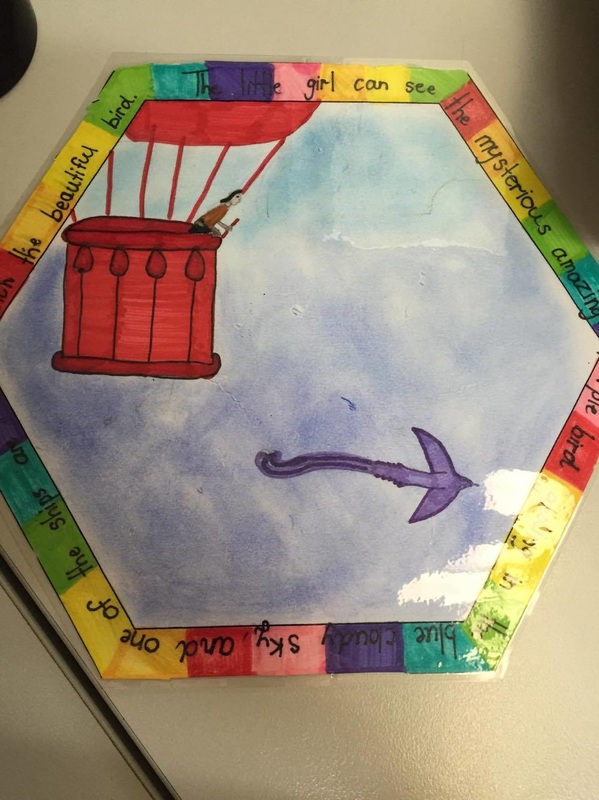
Term 1 Week 5- 'Journey' Picture Quilt
Using the descriptive sentences we wrote in class based on 'Journey' by Aaron Becker, you need to pick a page from the text that you like. Inside of your quilt template, you need to illustrate images from your chosen page, and write your descriptive sentence with your brilliantly used adjectives around the border. These are then to be beautifully coloured and your sentences outlined in black marker, ready for laminating. An example completed by one of my previous students has been provided for inspiration.
Our finished products will form one beautiful picture quilt on our Journeys wall display. I'm excited to see your wonderful designs! :)
Our finished products will form one beautiful picture quilt on our Journeys wall display. I'm excited to see your wonderful designs! :)
Term 1 Week 4- Anti-Bullying Poster
Your task for art this week, as part of a competition involving lots of Australian primary schools, is to design an anti-bullying poster that encourages kids to be independent, and acknowledges that everyone is different.
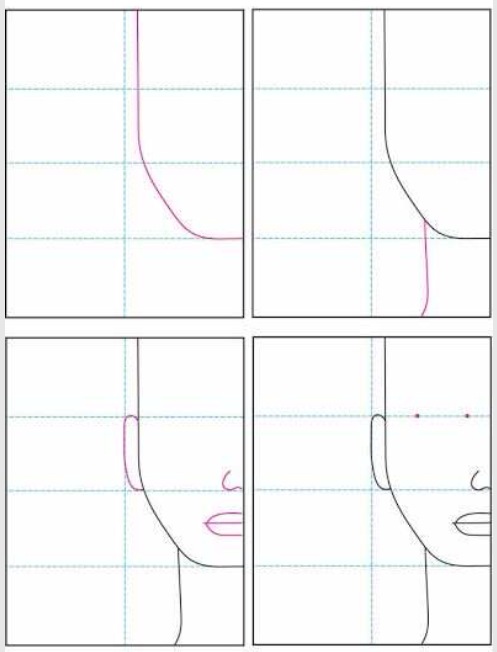
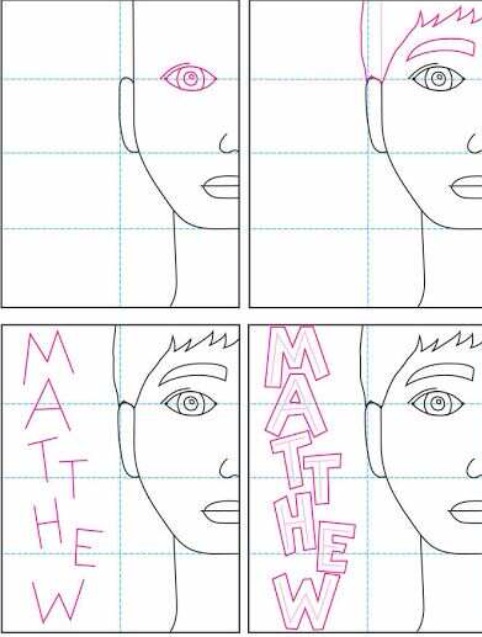
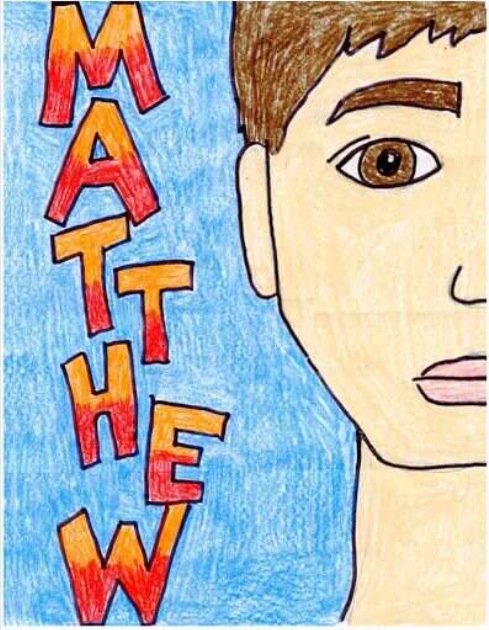
Term 1 Week 3- Self Portrait Art